Ensuring “In-House” Measurement Traceability
In my previous role as a Quality Manager within a Fabrication company, one of my responsibilities was to carry out calibration testing on various items of measuring equipment utilized by the various tradespersons within the organization.
Measurement traceability is not only a requirement, but an essential part of providing confidence in the validity of measurement results. The company used various items of measuring equipment to verify everything from the weights and dimensions of products and components through to their many processes and activities.
Minor items of measuring equipment (such as Digital Verniers and tape measures) requiring calibration were used to carry out “in-house” readings, rather than utilizing an external accredited calibration service.
Note: If your business has made this decision then it is important that any “in-house” calibration testing is carried out by competent personnel and is an essential requirement is to provide traceability of results of such testing.
All items of measuring equipment in the traceability chain were verified at regular or specified intervals; it is not the case that once you have had your reference standard calibrated you can continue using it for years without recalibrations. The calibration of any measurement device only remains valid for a stated period of time. Therefore, the traceability expires when the calibration expires.
Maintaining Traceability
In order to maintain traceability on a continuous basis, reference standards and measuring equipment are subject to further calibrations on an ongoing basis, which is why the establishment of a calibration programme is necessary. The intervals between calibrations will depend on various factors, including but not limited to:
-
The measurement uncertainty required
-
The past history of the equipment, including the results of calibrations and frequency of any necessary maintenance
-
The frequency of use of the equipment
-
The frequency of cross-checking against other equipment or of intermediate checks
-
The recommendations of the manufacturer
-
The environmental conditions to which the equipment is exposed, including any effects due to transportation
In the process of calibration, the displayed value of the measuring equipment is compared with the measuring result of a different measurement device which is known to function correctly and accurately, which itself has been made to coincide directly or indirectly with a national (or international) reference instrument. In short, to be able to compare the measuring results, they must be “traceable” to a national or international standard via a chain of comparative measurements.

You must ensure that items of measuring equipment are uniquely identifiable in order to determine their status.
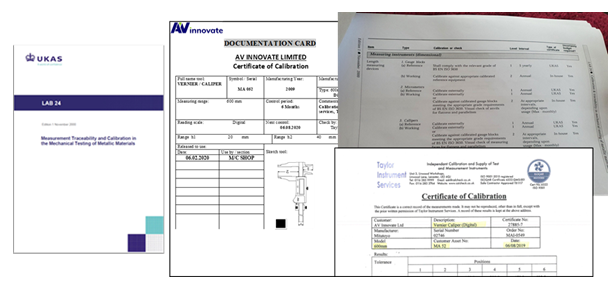
The company had a detailed calibration register in place, with all items of measuring equipment carrying a unique id number. In-house tested items have a “Calibrated” label applied and certificate of calibration with results held electronically. Testing and updating this register was controlled by the Quality Representative.
Calibration of specialist items of measuring equipment was outsourced to an external calibration service provider, with checks made to ensure this provider was registered and accredited to a traceable national standard (ISO 17025:2017, General requirements for the competence of Testing and Calibration Laboratories). Calibration reports and certificates were issued by the provider, and these were held on file for auditing purposes.
In general, calibration of equipment needs to be traceable to national measurement standards, and when using external calibration services a valid certificate should be obtained from a calibration laboratory that demonstrates competence, measurement capability and traceability. A calibration certificate bearing the UKAS accreditation (or identity of the national standards laboratory or mark of an accreditation body with which UKAS has a recognition agreement) for the relevant calibration/verification will be sufficient evidence.
Items of measuring equipment must be safeguarded from unnecessary adjustments, damage and deterioration that could invalidate the calibration status and subsequent measurement results. Your organization must provide the means to ensure measuring equipment is safely stored, controlled and issued to operators as required. Any items of measuring equipment found to be damaged are to be reported; quarantined from use, checked and arrange replacement if required as soon as possible.
- Neale Woods, NQA UK Regional Assessor
